Subscribe: RSS
The Handyguys upgrade their faucet hardware and provide videos to prove it!

Many weeks ago we promised to talk about faucet installation. Brian recently installed a great Price Pfister

But, before we can talk about basic plumbing and installing fixtures, we have some other matters to address.
Handyguys Video?
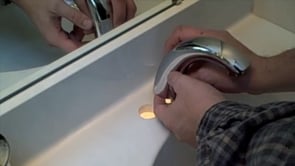
Both Brian and Paul filmed their installation to provide an overview of a faucet upgrade. If you have not installed a faucet before, we hope these videos will be helpful. We are going to include links to both videos. While the videos are similar, we produced them in slightly different ways. The intent of both videos is to quickly show each step of the process. In Handyguy Brian’s video, he narrates each step, but in Paul’s video we just use text to explain the steps.
These are really just sample videos. Neither sound or video quality is very good. We are looking for your feedback. We would like to know if you value videos like this and how you might view and utilize such media. Remember, these videos are just prototypes. If we decide to continue with regular video, we will probably upgrade the quality.
Grohe
Price Pfister
After watching the two videos, please take our survey.
Grohe and Price Pfister Installation

In this week’s podcast, The Handyguys discuss the process of upgrading faucet hardware. Brian talks about his beautiful and stylish Price Pfister Ashfield faucet in rustic bronze. It is a faucet that looks like an old well pump. Not only is it stylish, but it is solid and works great with just one hand! In addition, this is a a “watersense” faucet which means that it saves 30% water which protects the environment and saves you money!
The Handyguys talk about the water sense program. You can find more info here: http://www.epa.gov/watersense/ The bottom line is that a home with watersense faucets can save a significant amount of water. The Handyguys hope to analyze this water savings in a future show to find out exactly how much is actually saved in their homes with watersense faucets.
Paul also installed a water sense faucet, but his faucet comes from Grohe. His Grohe Arden faucet is a solid and sleek addition to his master bathroom. You can learn about Grohe’s amazing line of products at http://www.groheamerica.com/. Don’t expect to see their products at the big box store though as they are only sold at local plumbing distributors or through special order. Fortunately, it seems that many plumbing suppliers carry Grohe and you can also find their parts on the Internet. Check out Grohe’s site for local distributors.
Brian and Paul determine that most handyguys can handle this project with only a few tools and a few supplies. You will need an adjustable wrench, channel lock pliers and possibly a basin wrench. You will also need some supplies such as plumbers putty or pipe dope and some braided hose. Listen to the podcast for more details.
The faucet upgrade is not a difficult job but it does require some patience and some agility to work with all the connections on the drain, stopper and supply lines. Hopefully the Handyguys’ discussion of their installs will give you the confidence to upgrade your sinks as well!

I can’t believe there aren’t any comments on here! Looks good guys, but could show a little more detail of the steps. I took the survey, and I liked Brians video better. I heard more grunting on Paul’s video! Are you guys seriously disfigured or something?? You seem to work extra hard to keep you faces from being shown in the videos and in any pictures you post. Maybe you are just that popular now and you don’t want people recognizing you on the street! Keep up the good work guys and I can’t wait to see your next video installment.
Thanks for the comment Nathan! We have received a bunch of survey responses and will be asking for more feedback in the next couple of posts. No – we are not disfigured! Well, our wives don’t think so anyway. Maybe we do show our faces in some future video, we will see.
Great work guys! Please add one thing though…WEAR SAFETY GLASSES. Two weeks ago, I installed a new bathroom faucet for my wife. I was under the sink, laying on my back and tightening the brass nuts. My slip joint pliers slipped off the brass nut and metal shavings fell onto my face. The next day my eye was bothering me. I discovered a small metal shaving embedded in my eyeball…Took a trip to the ER and had it safely removed. I was very lucky. ALWAYS WEAR SAFETY GLASSES!…Especially when working metal on metal.
Good advice JK! Thanks for the feedback.
You guys may have saved my relationship with The Guy from becoming a home renovation casualty. Thanks
We are here to serve! Thanks for listening.
good concept
Viewers, fans, listeners, please note – A very astute viewer has pointed out that the washer, known as the mack washer, under the bowl, where the tailpiece connects, was shown upside down in the Grohe video. Rest assured the washer was correctly installed and there are no leaks.
Please remember follow the manufacture install instructions. Our videos are intended as an overview of the process, not a step by step tutorial covering every aspect of every situation. If in doubt of your abilities please consult a Master Plumber.
Hey guys, I just installed a new bathroom vanity so I don’t have a use for this. But I thought I’d share in case any of you do! Cabinets To Go (who I got my vanity from) is actually giving away a free bathroom vanity. Just click the link: http://www.cabinetstogo.com/Bathroom-Vanity-Contest.asp and vote for which vanity you want. Then you’re entered to win that exact one…pretty easy! GOOD LUCK :))))